Telnet is a protocol that enables a remote connection to a system using the console. Don’t mix this up with a remote desktop. The proticol is not secure!
In this example we will establish a connection to a Linux system running on our Fritz!Box. Since telnet is an unsecure connection, I explain how to establish a secure connection in section SSH+SFTP. There is no need to worry about security since we open telnet only internally – a potential hacker would only come from the internal net. CAUTION: Other having access internally, as family or or flat sharers would have acces and coul get acces privileges (eg. your kids). If this could happen I recommend to switch off telnet access after SSH is installed. Until that is done you have to accept the risk!..
Set up or turn off telnet
Dial with phone switched doff:
– #96*7* Telnet on
– #96*8* Telnet off
Hint: If successfull you get a confirmation beep for 1 sec.
Entry
Note if using Windows bash: Telnet deamon must be installed separatly under Windows Vista und Windows 7. I recommend to use Putty!
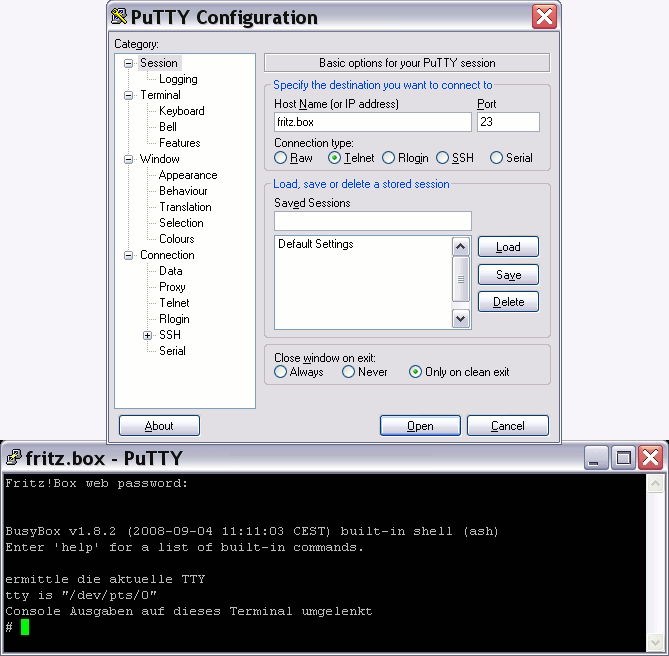
Via putty

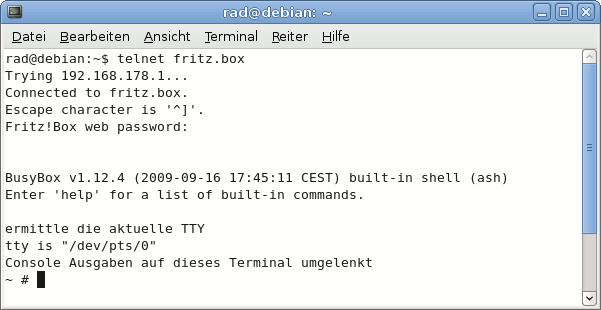
Via linux shell

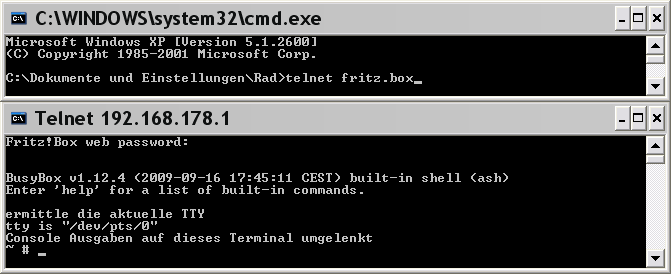
Via windows bash

Eintrag in debug.cfg (siehe Kap. “debug.cfg”)
|
1 2 3 4 5 6 7 8 9 10 11 12 13 14 15 16 17 18 19 20 21 |
HOMEPAGE=http://www.pfadZurSchareHomepage.de # oder Pfad zum USB-Device #>> telnet if [ "$(busybox | grep -q -E -e '[[:space:]]+telnetd,')" = "1" ];then /bin/busybox telnetd -l /sbin/ar7login else { while !(ping -c 1 $HOMEPAGE); do sleep 5; done wget -qO /var/utelnetd $HOMEPAGE/utelnetd # Ohne Passwort-Abfrage # echo "root::0:0:root:/var/tmp:/bin/sh" > /etc/passwd # chmod +x /var/utelnetd # /var/utelnetd -d -l /bin/sh # Mit Passwort-Abfrage chmod +x /var/utelnetd /var/utelnetd -d -l /sbin/ar7login } & fi #<< telnet |
